DITO SIM Registration (Online Form with link) 2024
Dito TeleCommunity has announced DITO SIM Registration for its users in support of Government Republic Act No. 11934 or the SIM Registration Act (SRA) against crimes and fraudulent activities. It is necessary to register by following these guidelines for existing or new SIM users before the Government responds in terms of deactivating your SIM cards.
During the DITO SIM Registration process, the new user of the SIM will receive an SMS with a registration form link after inserting the SIM Card into the phone, while existing users will have to process it via any method of DITO SIM Registration given below to protect themselves from online scams, theft, spam texts, fake news, smishing, and other fraud cases.
Methods of DITO SIM Registration
DITO SIM Registration process is divided into 3 methods whether you’re a prepaid or postpaid existing user. These registration processes are as straightforward as Globe SIM Registration and smart sim registration. Here are the methods you can access to process SIM card Registration:
- Via DITO APP
- Via SMS Link
- Via Web Portal Link
DITO SIM Registration APP Method
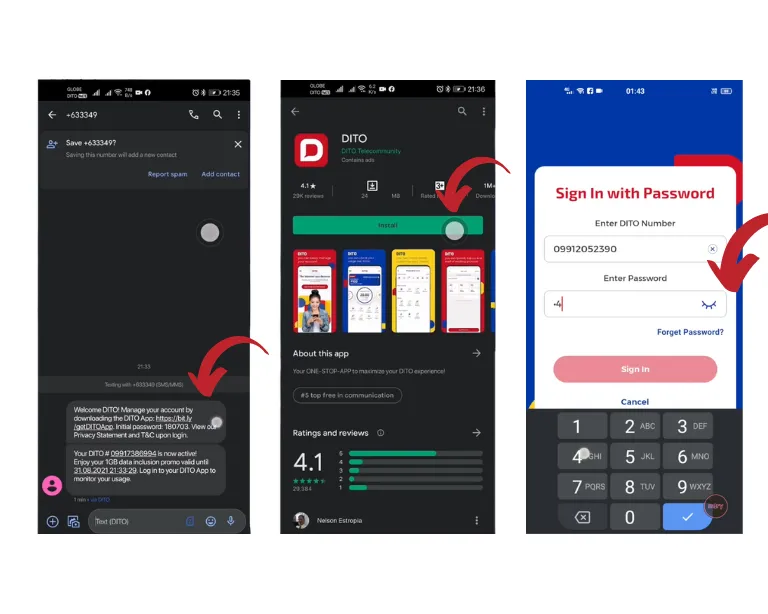
- First, you must download the Dito App on Android or iOS on your mobile.
- Open the Dito App after it is downloaded and successfully installed.
- Log in to the application with your username and password.
- Now on the Dashboard, click on the “SIM Registration” icon or “Register your SIM” Banner.

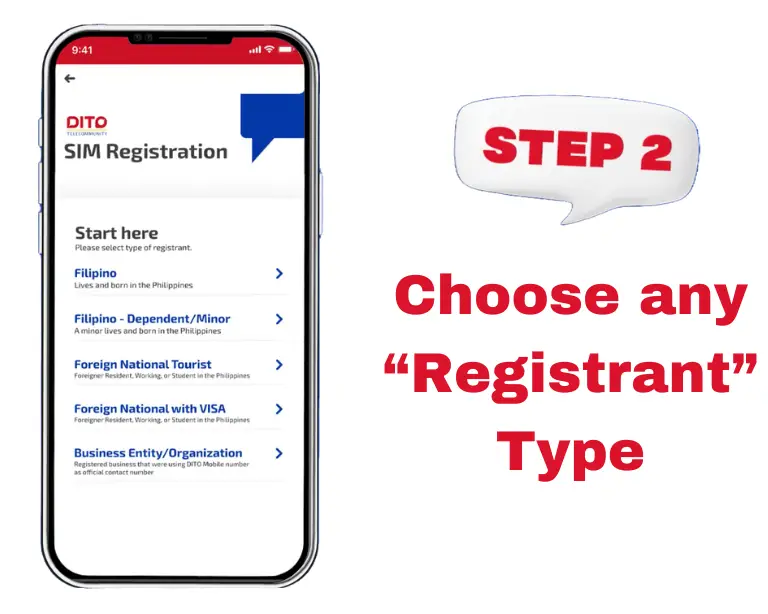
- Select the Type of registrant.
- Registrant Types include: – Filipino, Filipino Dependent/Minor, Foreign National Tourist, Foreign National with VISA, Business Entity/Organization
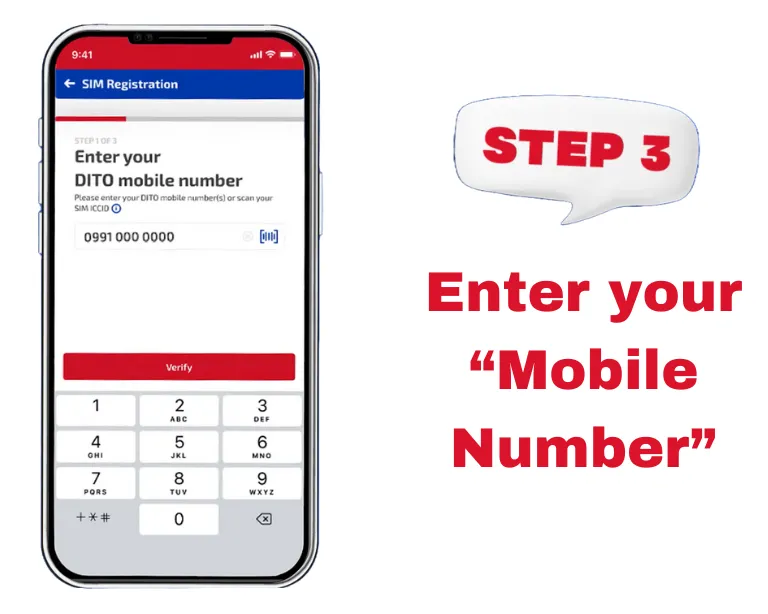
- Enter your 11-digit “DITO Mobile Number” to receive a one-time PIN or you can also scan your SIM ICCID.
- Click the “verify” Button to proceed.
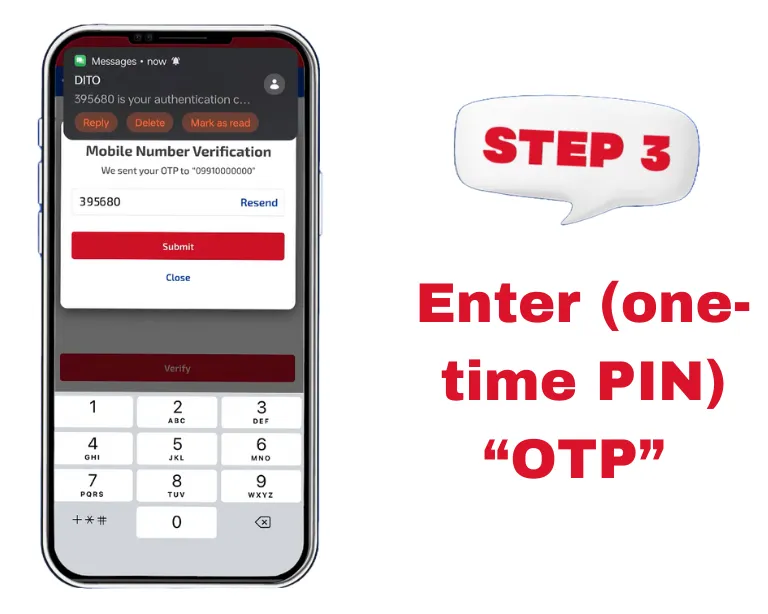
- Now enter your one-time PIN “OTP” to verify your phone number.
- Click on the “submit button to proceed further.
- Now you will need to be verified with your chosen government-issued ID Card.
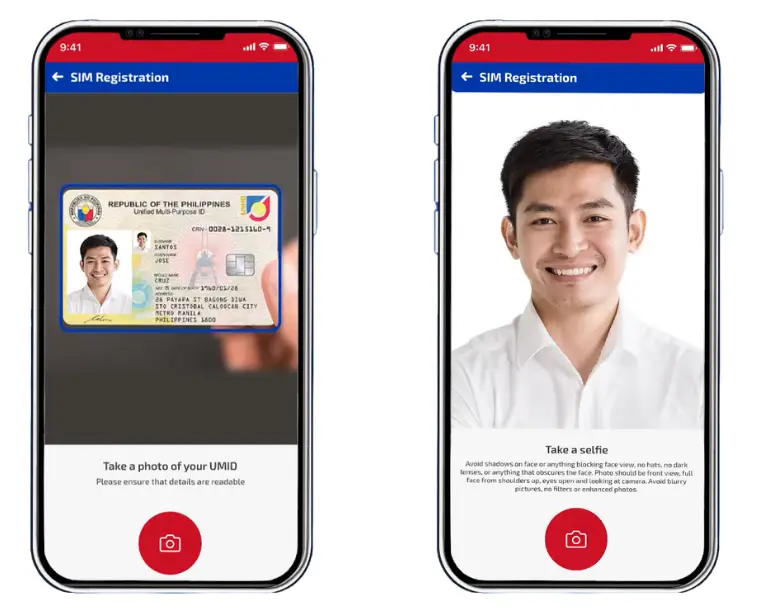
- So, click on the “Camera” icon to capture a photo of your ID card by ensuring that the ID Card is readable. (ID Card List is mentioned in the section below)
- Once the ID Card photo is uploaded, you must upload your selfie for further verification.
Note: Avoid shadows on the face or anything blocking your face view, no hats, no dark lenses, or anything that hides the face. The photo should be a front view, full face from shoulders up, eyes open and looking at the camera. Avoid blurry pictures, no filters, or enhanced photos.
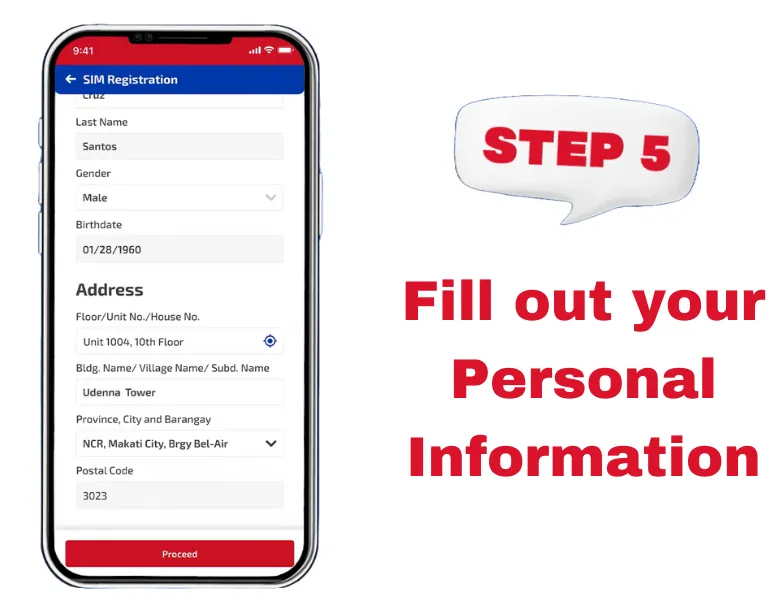
- Now fill out your personal information form. After filling in the form, click on the “Proceed” Button.
Note: Your Personal Information must be legal and confidential according to the Philippines Government Issued ID Card for SIM registration, whether it’s TM SIM Registration or DITO.
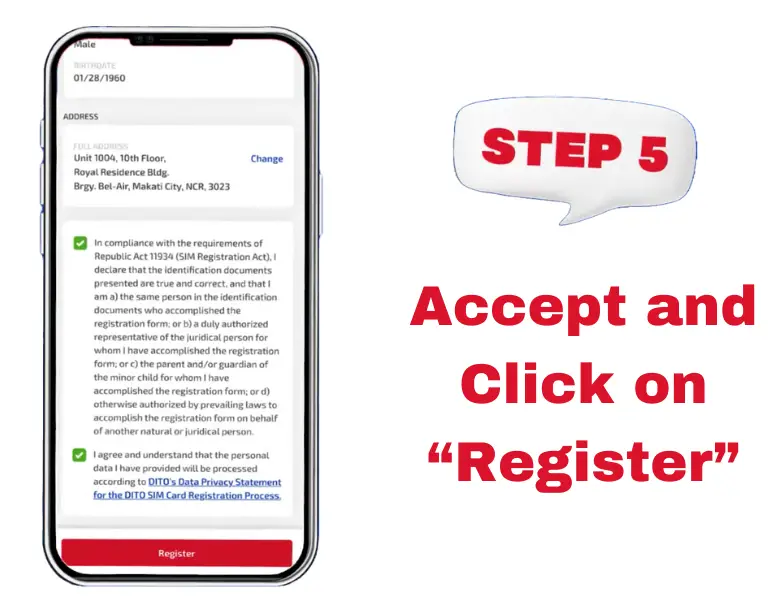
- In next section, DITO Telecommunity allows you to edit or change your provided data to remove mistakes in personal verification.
- After checking your data, “check box” two boxes to agree to the terms and conditions.
- Click on the “Register” button to complete the procedure.
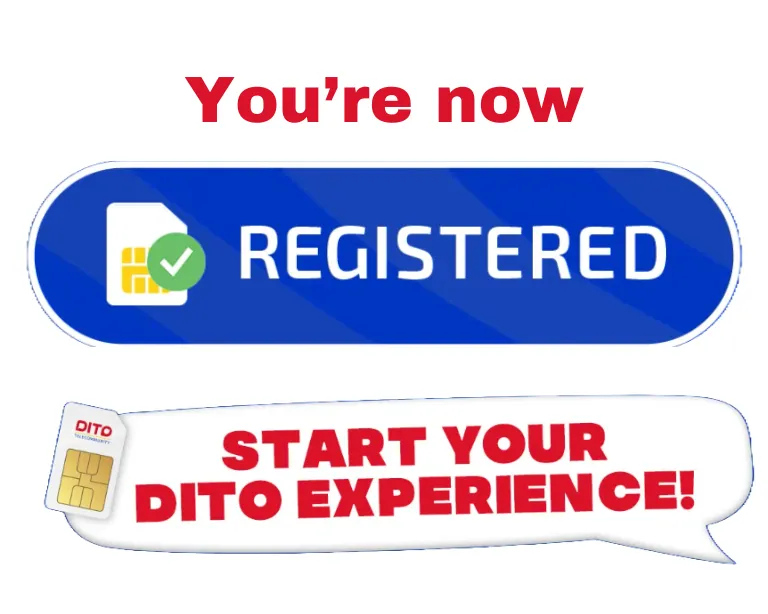
- Congratulations, you’re now registered with the DITO SIM Card.
- You can start your experience with DITO and share it with family and friends.
DITO SIM Registration via SMS Link Method
The new subscribers can register their SIM Cards via SMS link, and the following are the steps to follow if you’re a new user of DITO:
- Insert your SIM Card into your phone.
- Check your phone’s “Message Inbox”.
- You will receive a link from DITO TeleCommunity.
- Open this link for the DITO SIM Registration process.
- Fill out the form according to the guidance provided in the DITO App Method.
- Submit it, and you will be successfully registered.
DITO SIM Registration via Web Portal Link Method
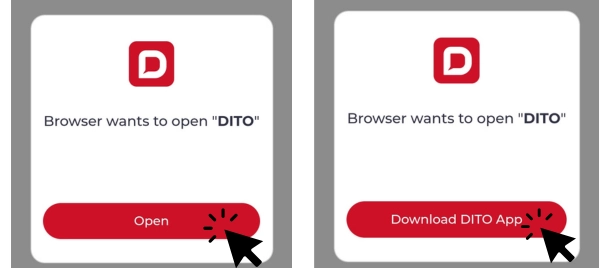
You can also open this link to proceed with DITO SIM Card Registration: https://register.dito.ph/
- It will take you directly to the DITO App.
- If you have not installed it, download and install it.
- Then complete your DITO SIM Registration via the DITO App method according to the above guide.”
SIM Card Registration Deadline
For Old Customers : If you are an existing subscriber and haven’t registered your DITO SIM, it will be automatically deactivated for calls, texts, and internet access. The SIM card registration deadline is July 25, 2023.
For new users : it is mandatory to register the SIM card after inserting it into your mobile SIM slot.
Encountering SIM Registration Failure
If you are experiencing problems with SIM registration failure, follow these steps to address these errors:
Encountering issues with uploading photos
In most cases, people encounter issues with uploading selfies. You should be aware that your photo must be clear, valid, and less than 2MB in size. Resize the photo using an online tool, or take a screenshot of the photo and upload it. Capturing a screenshot will automatically resize your photo.
Alternatively, contact the official DITO SIM Registration number at 185 to address any SIM registration problems, using your DITO SIM card
Personal Information Requirements
DITO SIM Registration requires different personal information according to different users. There are the following categories of users according to DITO:
- Full Name
- Date of Birth
- Gender
- Present or Official Address
- Government ID card of Parents/Guardian
- Parent’s Consent/Guardian’s Consent to register DITO SIM Card
- SEC/DTI Certificate of Registration
- Special Power of Attorney (SPA) or Board Designated Resolution
- Passport
- Address in the Philippines
- Return Ticket with Departure Date/Time from the Philippines as Proof
- Passport
- Address in the Philippines
- Bureau of Immigration (BI) issued Alien Certificate of Registration Identification Card (ACRI Card)
- Visa-issuing agency issued official ID
- School registration and ID for students
- For Persons of Concern or POCs, travel or admission document issued by the Department of Justice.
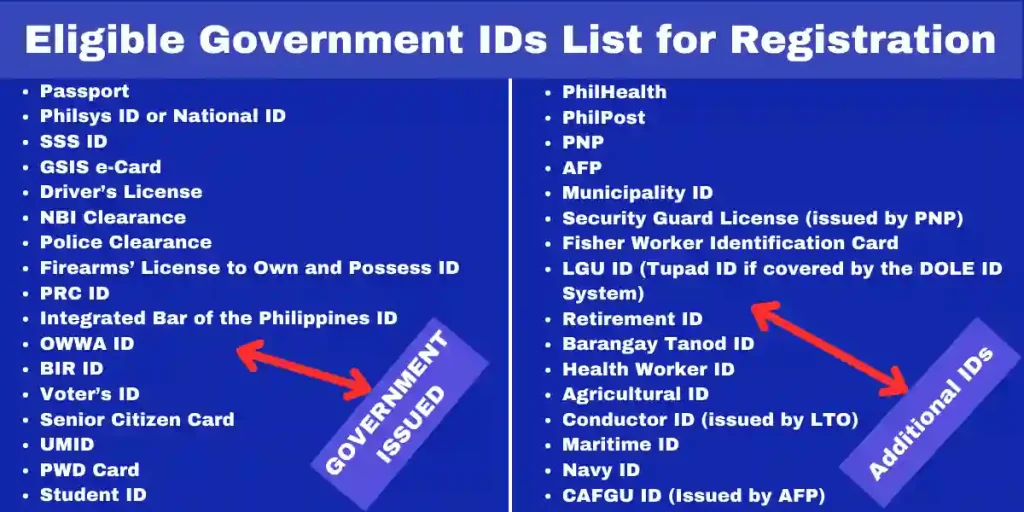
Eligible Government IDs List for Registration
Dito TeleCommunity has updated the accepted Government IDs list as of January 2024. A few additional IDs have been added to the list in response to users’ demands.
Government IDs
Additional IDs
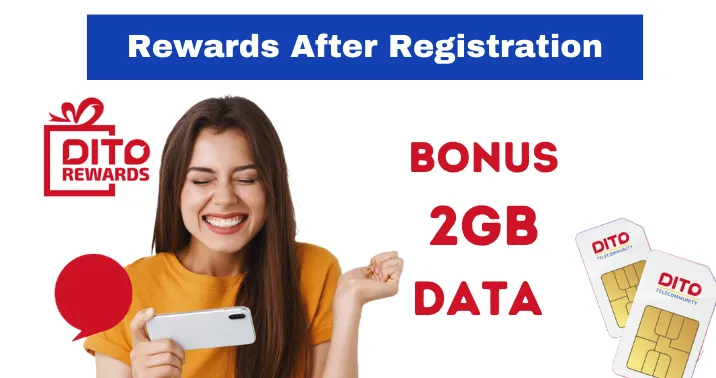
Rewards After Registration
When you successfully register for the DITO SIM Card, DITO provides you with bonus gifts on your SIM. The following are the gifts:
2GB Bonus Data
DITO offers you 2GB bonus data on your SIM card immediately after your successful registration with DITO for the first time. Now, you can enjoy data roaming with family and friends. You can register for this SIM according to the above guidelines.
Loyalty Rewards
DITO offers you the opportunity to earn points when you purchase promos with DITO payment partners such as credit/debit cards, GrabPay, MaYa, WeChat Pay, and GCash, similar to what TNT SIM provides. You can earn rewarding points by purchasing data load.
| Promo | Channel | Earning Points | DITO Points Earn |
|---|---|---|---|
| DITO 199 | DITO APP, MyDITO | 3% | 5.97 |
| DITO 199 | others | 1% | 1.99 |
Dito Compatible Phones

Here is the list of 4G mobiles compatible with DITO: Google, Cherry Mobile, Honor, Huawei, Infinix, Itel, MyPhone, Narzo, Nokia, Nubia, Oppo, Poco, Samsung, TCL, Tecno, Vivo, Xiaomi, and ZTE.

Here is the list of 5G mobiles compatible with DITO: Huawei, Infinix, Narzo, Nubia, Oppo, Poco, Realme, Samsung, Tecno, Vivo, Xiaomi, and ZTE.
Tip for non-compatible Phones
If your phone is not compatible with DITO, you can set the APN manually to make your phone compatible. These few steps can turn your phone from non-compatible to compatible for DITO:


Nice one
Hello po pwede po ba irecover ang simcard na. Nawala in the same # po?
Yes
kabibili ko ng Sim ng DITO 09930447619 pero ayaw nagregister walang OTP n dumating sa akin. ANo ang dapat kung gawin pra nagregister? Salamat
Please try again there may be a network problem
Please verify my new sim card